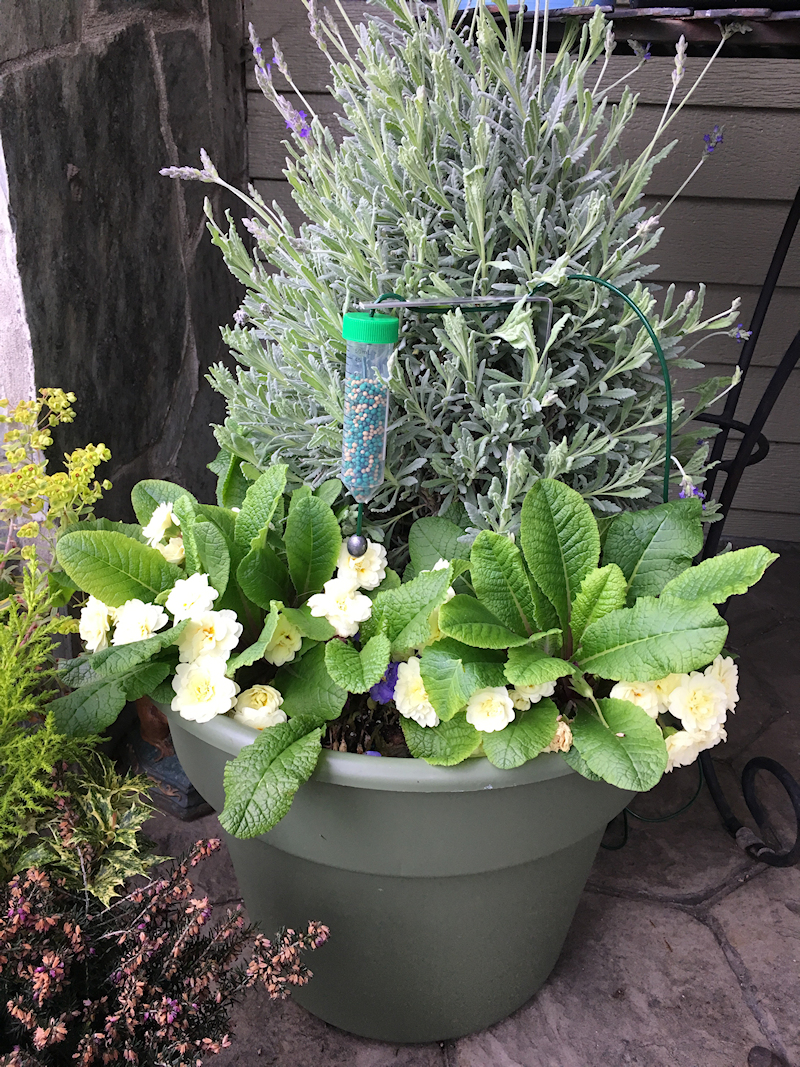
The Plant Booster self watering system will look after watering your plant, but looking after the plant, dead-heading, trimming and adding in fertilizer to your container plant during the season will boost the plant’s performance.
If your containers don’t have slow release fertilizer already added into the soil of the container, using a fertilizer tube to add it in is an easy way to do it.
The way it works is that water drips into the fertilizer tube when the plant becomes lighter, the tube fills up with water, flooding the slow release fertilizer, and then overflowing through the inner tube into the plant. This way with every drop going into the plant will contain some dissolved fertilizer.
The fertilizer tube that can be bought as an accessory can be set up as follows:
It is hard to say how long the fertilizer lasts because that depends on the fertilizer used, temperature, and the water drip rate, but using a Ozmocote Koch Polyon slow release fertilizer like an 18-6-12, or 16-6-12, I have noticed a significant improvement in the plant’s performance for a period of several months.
Note that because of the way the Plant Booster system works, basically everything dripped into the plant stays in the plant because unlike conventional systems, the plant only gets as much water as it needs, not to the point where excess water drips out (taking nutrients with it)
For best effect I recommend changing out the fertilizer every 8 to 12 weeks. Occasionally adding in a supplementary shot of a liquid fertilizer like Miracle-Gro won’t hurt either.
Filling the fertilizer into the fertilizer tube is described in the instructions below.
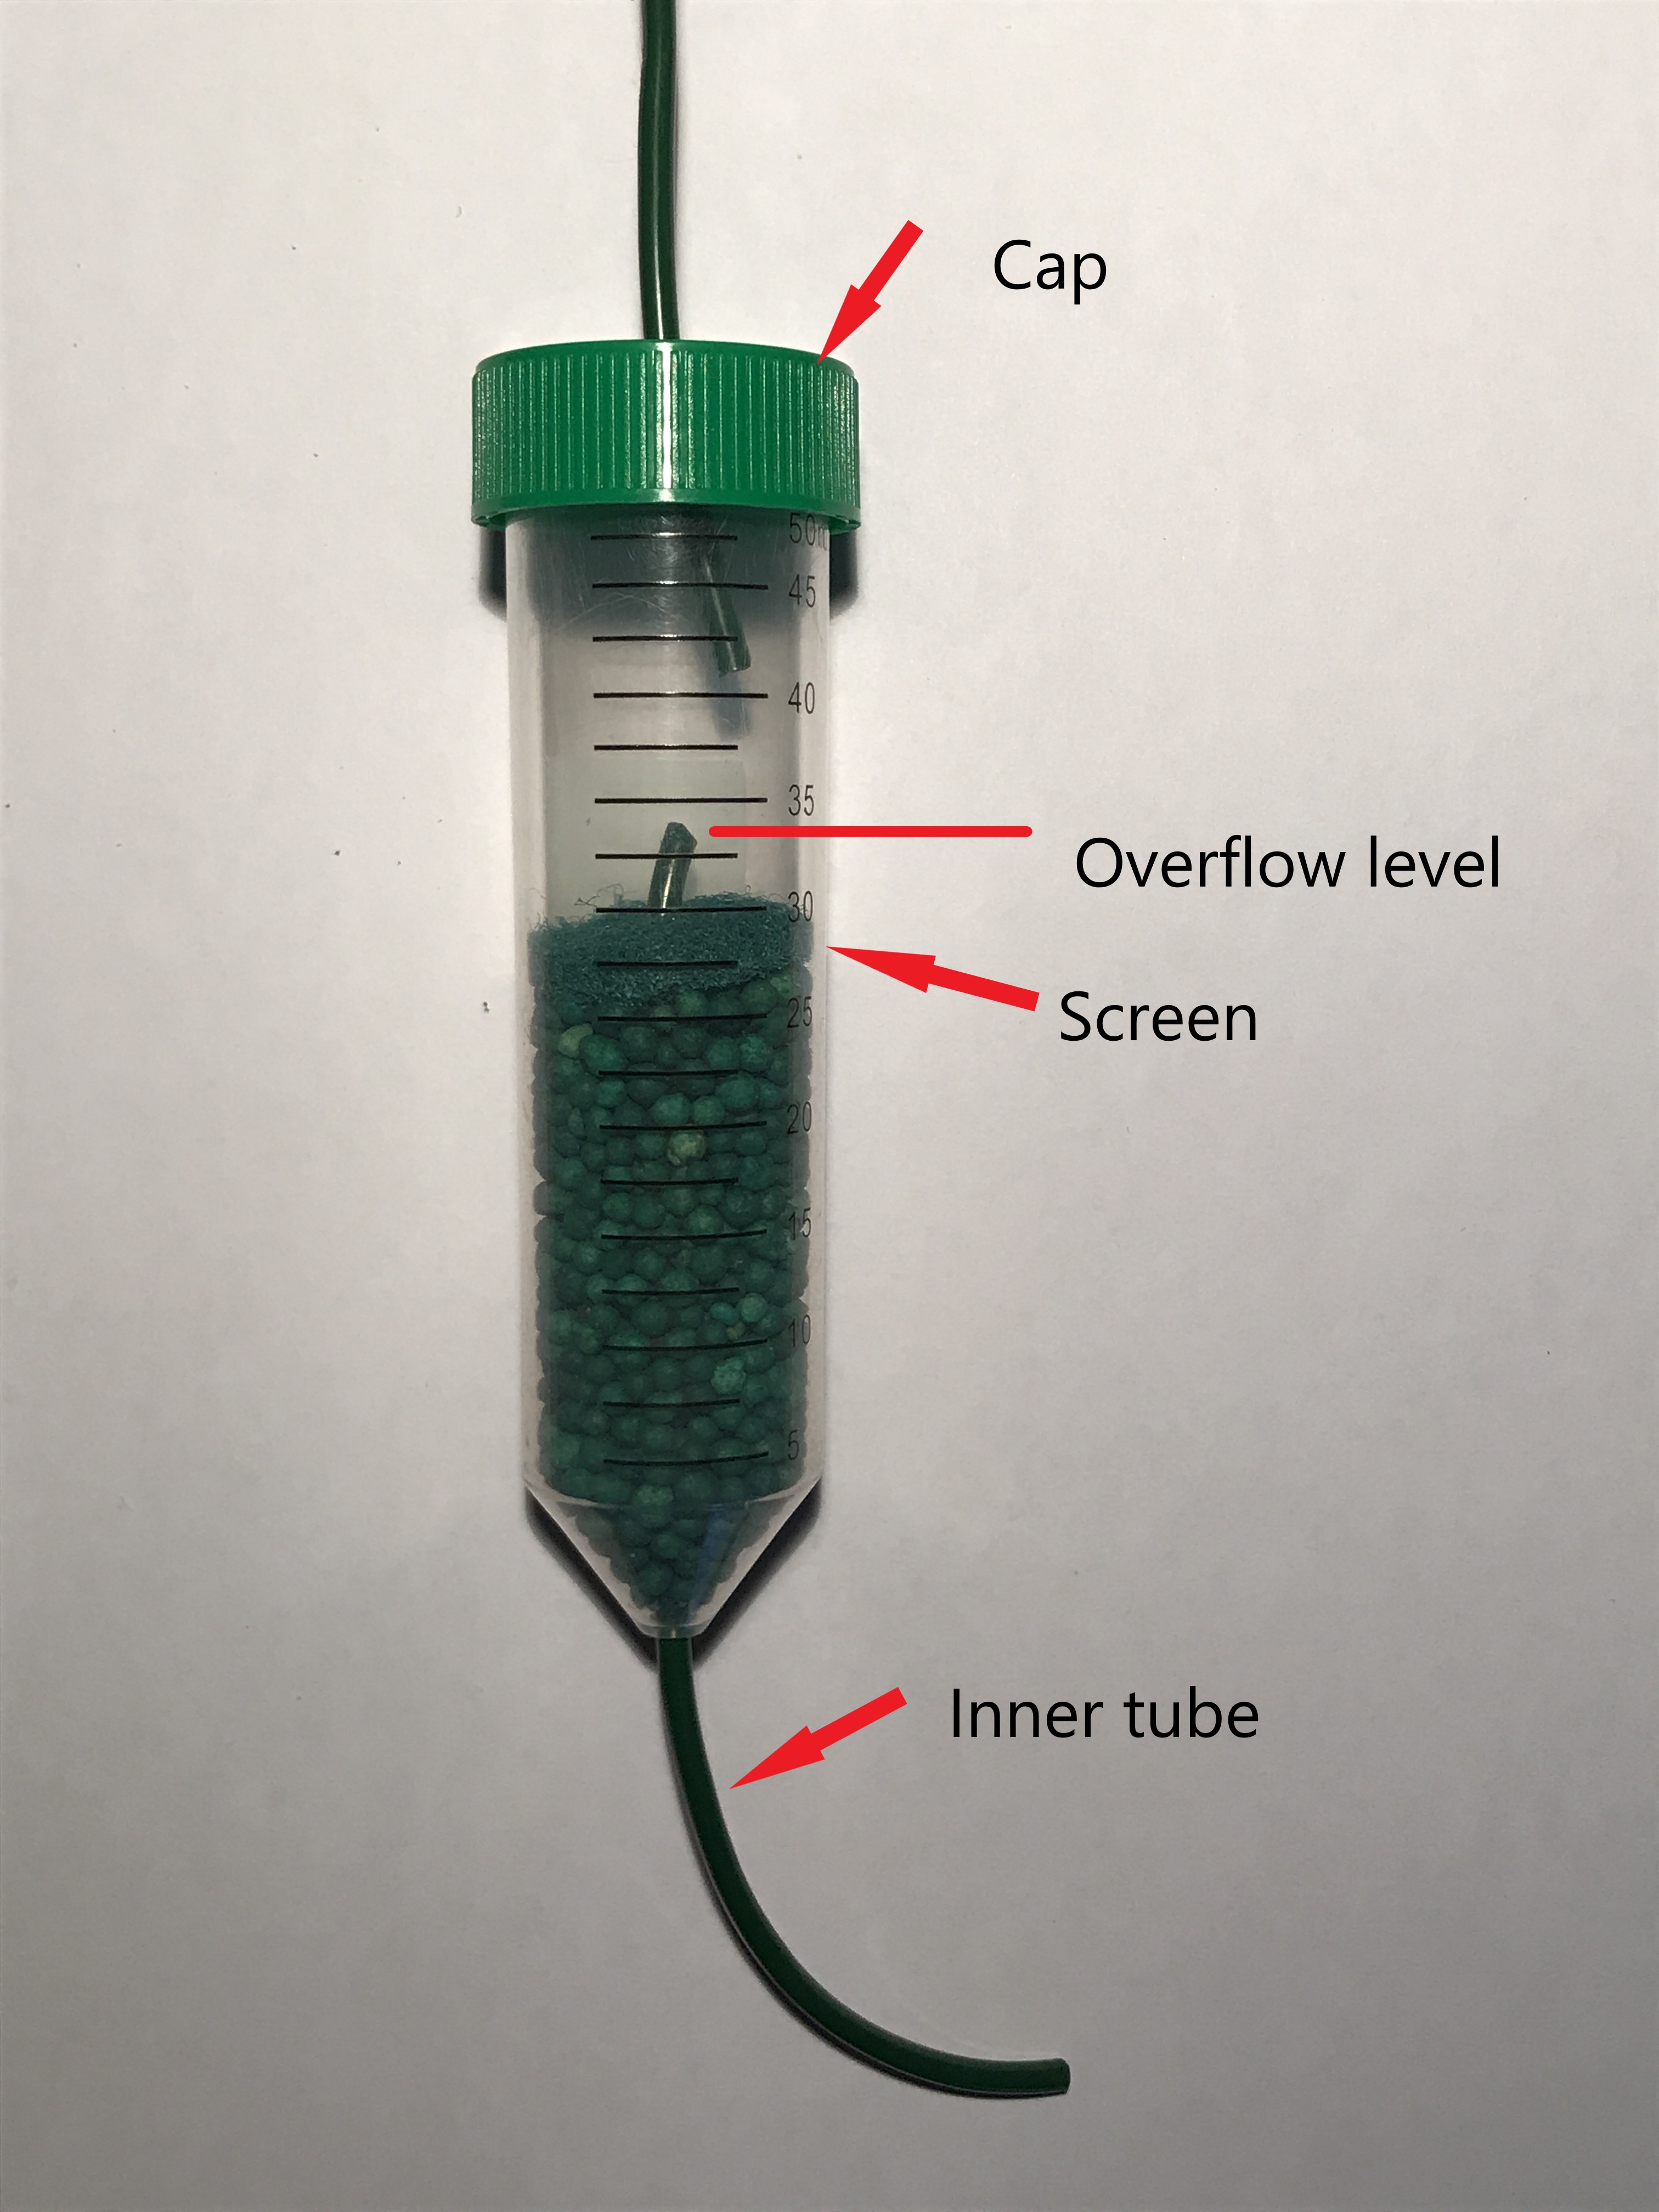
- The fertilizer tube consists of three parts
The fertilizer tube (test tube),
Fertilizer screen, and
Inner tube
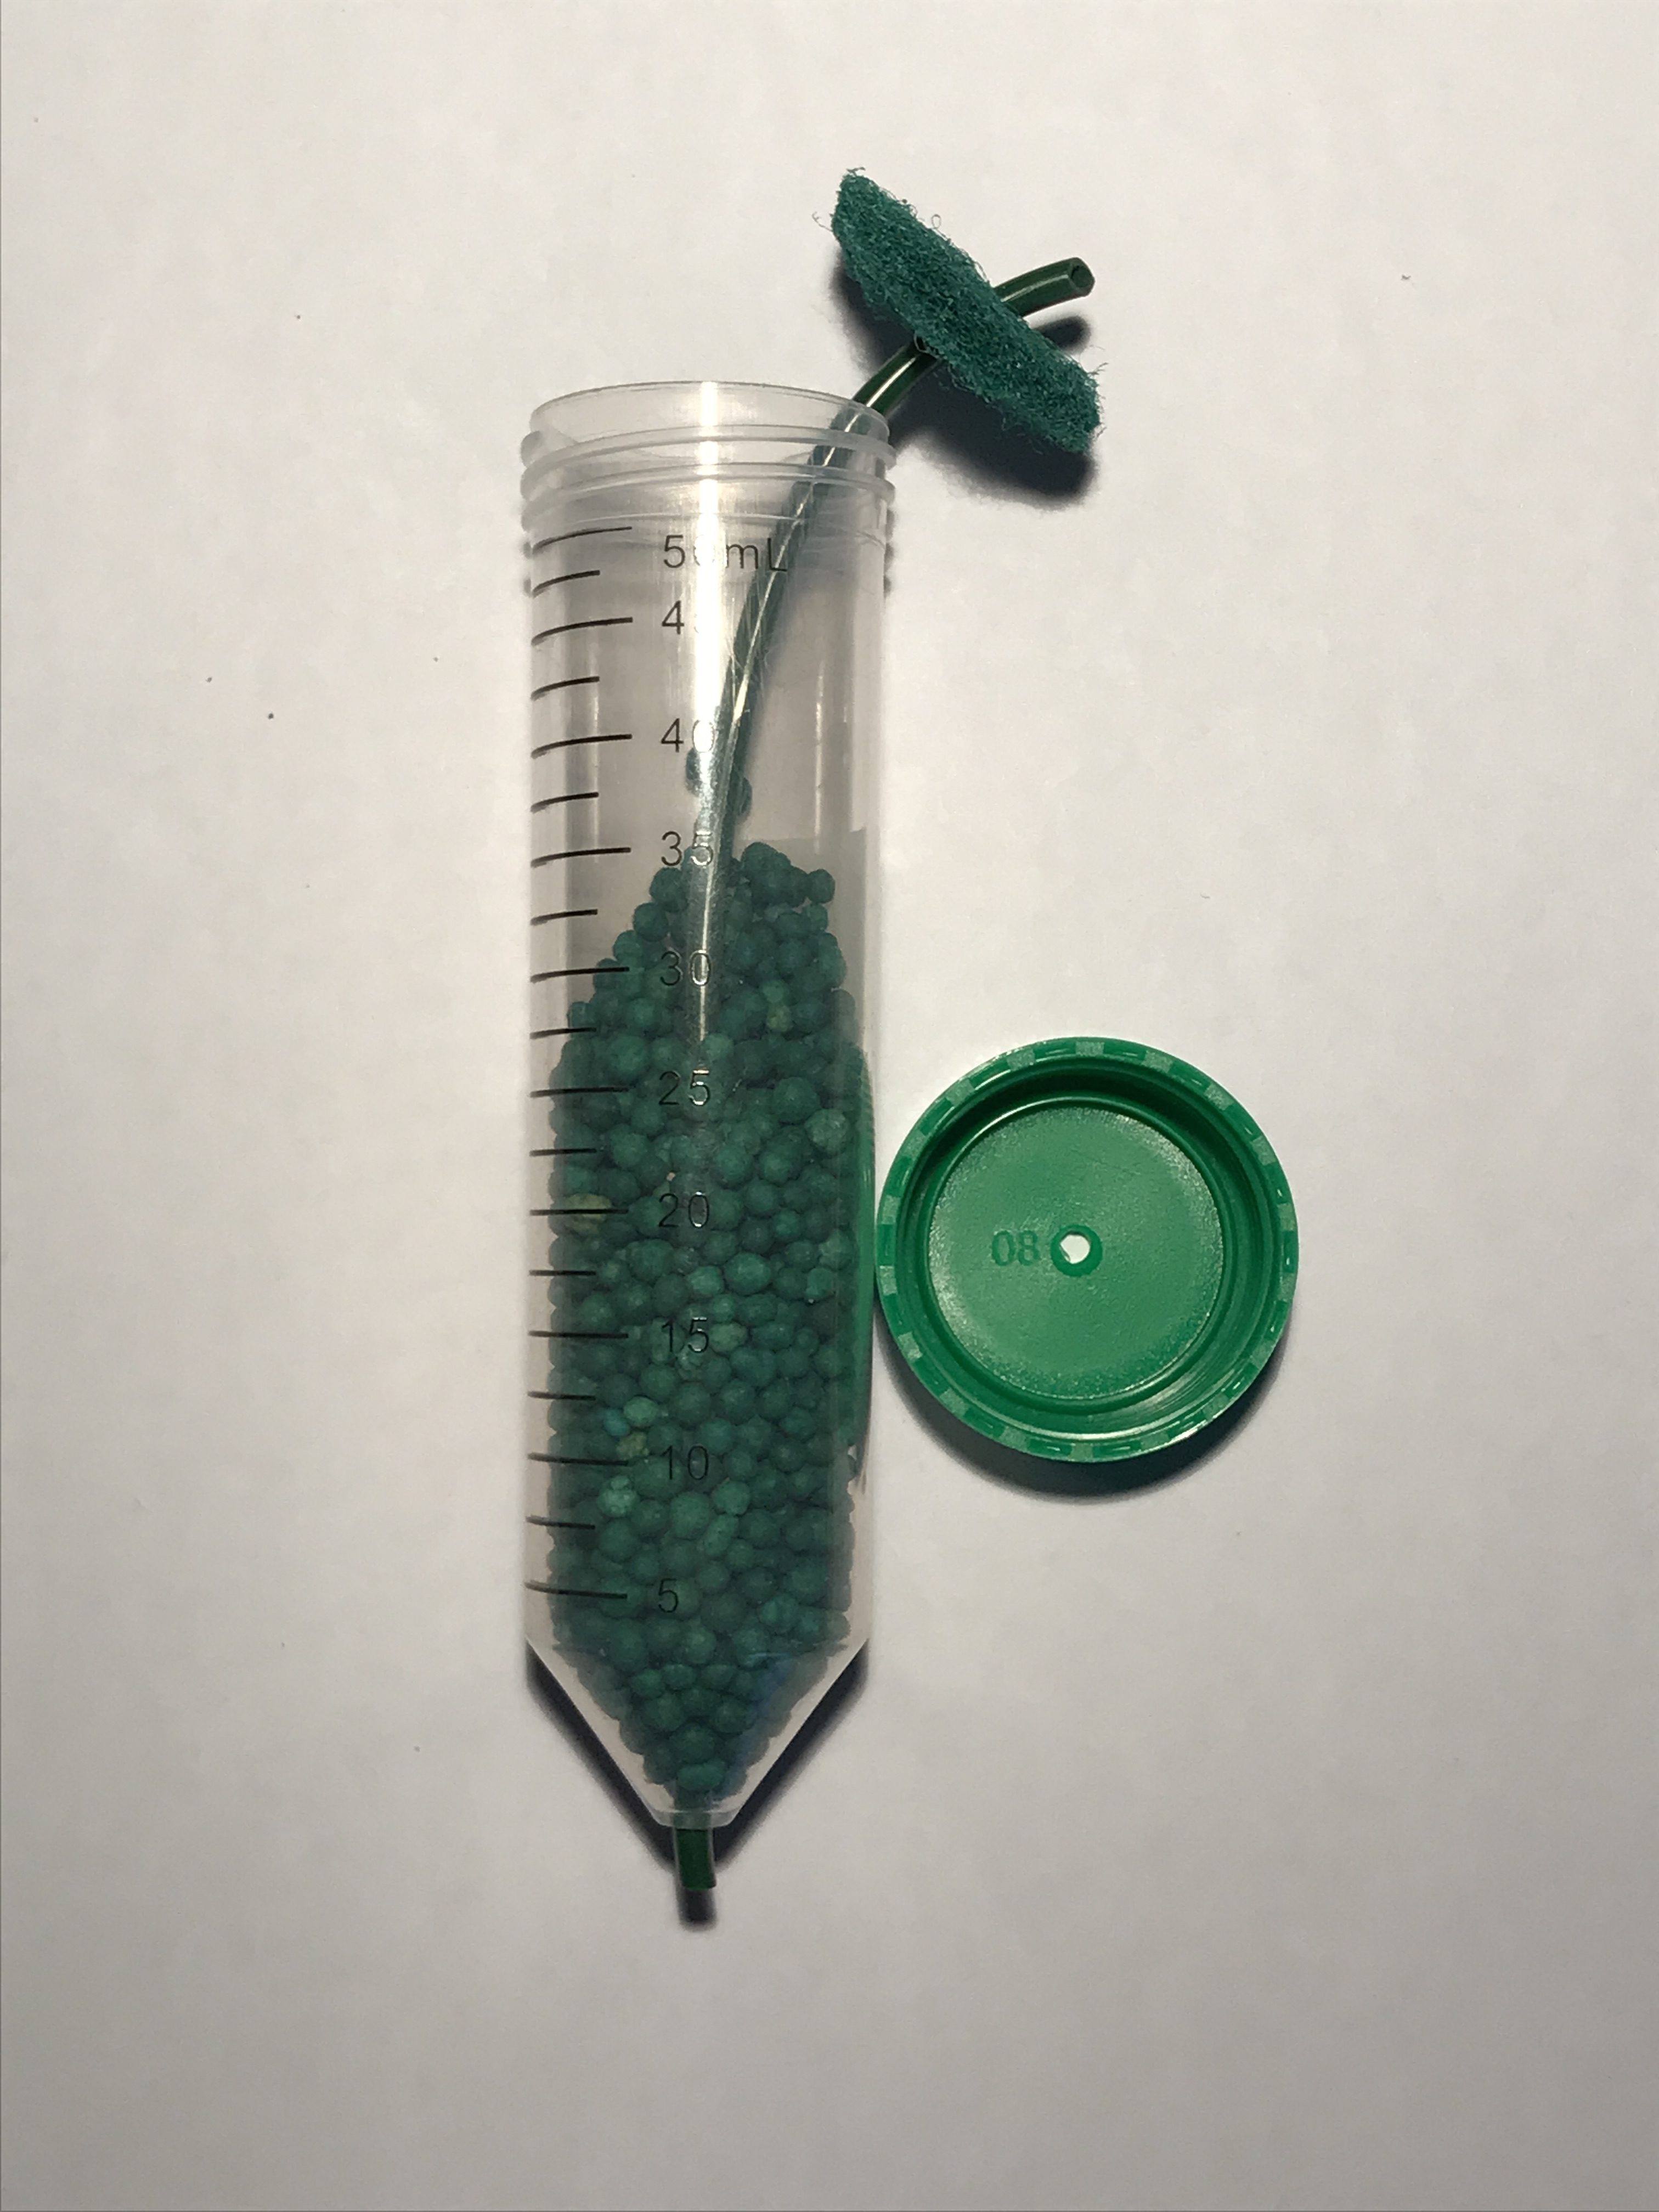
- Start by taking the cap off the fertilizer tube and pulling the inner tube up and out a bit of the top just enough so that the screen can be pulled to the side to allow you to fill the fertilizer tube with slow release fertilizer balls. Using a pair of long-nose may make it easier to reach into the fertilizer tube to pull it out a bit.
Note: Take care not to pull the inner tube right out from the bottom of the fertilizer tube.

- Fill the fertilizer tube with slow release fertilizer to about the 30 mark. Depending on the brand of slow release you are using, the fertilizer will slowly release into the water over the period of about 8 weeks to 4 months.
- Pull the inner tube back down, as well as the screen, and tamp it down on top of the slow release fertilizer. The Inner tube should protrude through the screen by about ¼” to ½”. The purpose of the screen is to stop the slow release fertilizer balls from floating on the water surface.

- Replace the cap snugly onto the fertilizer tube.
- Hang the fertilizer tube into your plant. The hole in the fertilizer tube cap is sized to fit over the green tubing snugly.
Note: You may hang the fertilizer tube as high or as low as you prefer. It is probably best that the fertilized drops coming out do not fall onto the leaves, but directly onto the soil in the basket, so hanging it lower will achieve this. The fact that the tube curls a bit coming out of the fertilizer tube is not a problem, and in any case won’t be visible as it is hanging inside the plant.
Tip: It may help to cut the green tubing tip at an angle to make pushing it through the hole in the cap easier. - Squeeze the hook end of the Plant Booster device a bit to purposely allow water to flow into the fertilizer tube to start filling it. It will take some time, and maybe some tapping encouragement to get the water fill the holes between the fertilizer balls. Any remaining air bubbles will eventually find its way out, so don’t stress about that too much.
- Assuming that you have make no adjustments to the wingnut on the Plant Booster device, the basket will call for water as it needs it. The water will fill the fertilizer tube, mix with the water in the tube in which the fertilizer has been releasing, then over-flow into the inner tube, and into the plant. The water level in the fertilizer feed tube should be static at the top of the inner tube protruding above the screen. From this point on, as a drop falls into fertilizer feed tube, a corresponding drop will overflow and fall into the basket.
Note: The fertilizer balls do not dissolve, so much as empty their contents slowly over time into the surrounding water and become depleted. After a period, the ball will be filled with plain water. The “Ozmocote” coating on the balls keeps the balls intact even though they are depleted Unless you knew that the fertilizer balls had been there for a while you can not see by looking at them that they are depleted. - While it is easiest to use the fertilizer feed tube in hanging baskets, by using a support as pictured below it is possible to use it on planters as well.